Federal Signal Model 19 How To Get Inside...

sting3037

New Member
Nov 5, 2017
7
Northeast Ohio
Good afternoon to you all.

I am a newbie at this site and I must say I've been kind of lurking for a couple months but finally took a dive to sign up today.

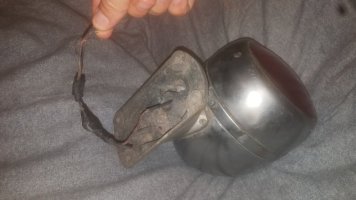
I came in possession of a Federal Signal Model 19 Propello Ray and I must say I'm still in disbelief of owning one. I got it as a barn find & it wasn't tested. I received it on Saturday and I'm still amazed how clean it still looks (some basic spit shining is all it really needs). My main concern is that there is only one wire coming from the bottom of the device and there is no second wire so I cannot confirm if this is the positive or negative. I attempted to open it up by first removing the brace that holds the faceplate up, but it appears to be rusted through (Image 1).
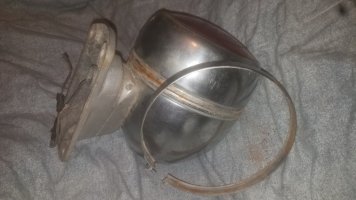
Image 1.jpg

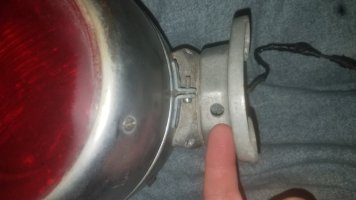
I then noticed three screws that I believe holds the red glass but as I attempted to remove them, they feel stripped but I still cannot remove them (image 2). I would like to know what these are for if anyone knows (Image 2).
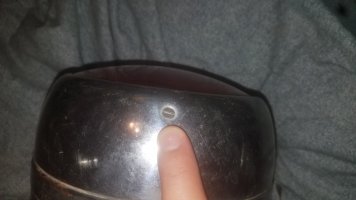
Image 2.jpg

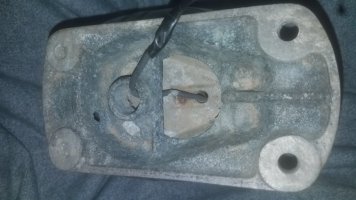
I kept exploring & noticed screws on the base of the Propello Ray and not sure if this is how I can get in (Image 3 and 4).
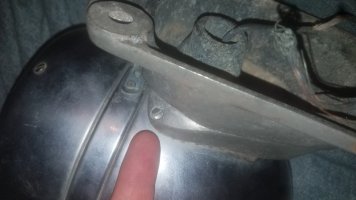
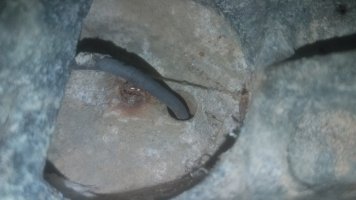
Image 3.jpg

Image 4.jpg

I don't want to damage it as it is a rare piece of technology and a lot of people want to see it run again. I want to try & get in to it, clean it, add new wires and test it. If I need a new motor, I will do some more research & find a similar model and then try it again. Any and all help will be very appreciated so I can open it up and get inside this beauty. Thank you for your time.
 

sting3037

New Member
Nov 5, 2017
7
Northeast Ohio
The base will be the negative or ground itself. The wire will be positive.

So to clarify, there is only one wire coming out of this model and it is positive. So it should work just by simply wrapping it around a positive terminal, correct? Just not used to having the positive wire available at least with my amateur experience.

20171105_221856.jpg
 

unlisted

Lifetime VIP Donor
May 20, 2010
7,333
NA
I cannot confirm for 100% however many old school beacons and warning lights would just have a insulated wire for positive power and the metal base would be the ground /negative connector.
 
  • Like
Reactions: sting3037

Dave F

Moderator
Sep 13, 2015
1,343
Berks County, PA
That metal base still has to go to a ground of some sort; in the case of older beacons the ground would be the chassis body they were mounted to.

Case in point you will need to have a negative lead touching/tied onto the metal base while applying 12v power to the positive lead
 

sting3037

New Member
Nov 5, 2017
7
Northeast Ohio
Still having some issues trying to make a connection and running the beacon. I believe the gauge wire is around 10 or 12 but I'm not sure of the wattage the beacon light is producing. Does anyone know the wattage of the bulb and the motor inside?

Also, as for the connections to the battery, I am not sure on where to put the ground. I have tried to attach it to the hole in the front on the base, but not sure if this is it.

15106279887941176186948.jpg

Is there another place to attach the ground to on the base? I'm not seeing a spot that could work.

151062806604679976253.jpg
 

Skulldigger

Member
Aug 23, 2015
1,740
Georgia / USA
Use a set of jumper cables and your car battery. Hook the positive to the wire and clamp the negative to the base anywhere. It should power up. IF not then there is a ground issue. Sometimes rust develops around the screws that hold the base to the light and it looses it's ground. Simple disassembly and cleaning will fix it. Also the connection to the bulb will corrode over time and the bulb may be good but not work. The bulb will be a standard automotive bayonet style bulb. Never took one of these apart. Usually I just start removing screws and see what comes loose. Take pictures along the way to remember how it goes back together. Try and remove the base first. The screw in the bottom of the base likely is what holds it to the light. It's probably long enough to go through the base into the housing and screws into the motor housing to hold it. The screws around the rim likely hold the retaining band on that holds the red lends in place. They could be stripped over time. find some way to pull them up as you turn the screws.
 

sting3037

New Member
Nov 5, 2017
7
Northeast Ohio
Ok so we were able to get inside the light with the help of a friend who knows motors and electrical issues. And thank you to the above who helped us to get in.

We tested the light by supplying it power by itself & it works fine, but the motor seems to be the issue. We cleaned up the motor inside however (cleaned the electromagnets inside the motor & cleaned the contacts), we feel that there may be some issues with the electromagnetic components inside the motor. When we cleaned up the contacts, we connect a power supply to it, you can hear a slight buzzing but the central bolt does not budge. Not sure on what else to do about it. We're thinking it may be an armeture (magnets in the motor - is that what it's called?), but when supplied with a charge, the magnets react. We can manually turn the main shaft by hand so it seems like there is nothing impeding it inside the motor casing. Are the electromagnets inside the motor positive on both side (or is it a positive ground)? Is the main drive shaft negatively charged?

We are kind of stumped & are hoping you guys have any possible solutions that we haven't attempted as of yet.
 
  • Like
Reactions: southpaw

southpaw

Member
May 7, 2015
723
South-West
Suggest you consider contacting Skulldigger on the board here. He does an outstanding job of rebuilding motors! Also might suggest a photo(s) of the motor,as someone may have one they might be willing to sell..
 
  • Like
Reactions: sting3037

sting3037

New Member
Nov 5, 2017
7
Northeast Ohio
Thank you southpaw! I'll look into that.

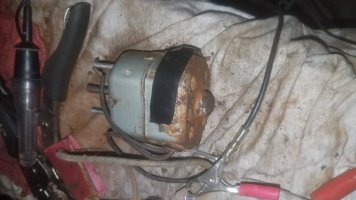
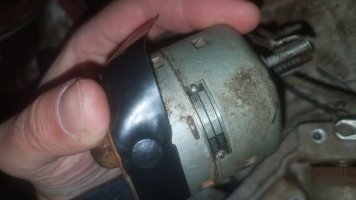
Here's the two images of the motor. I couldn't get a picture of the interior at the time but I was able to snag a couple before the motor casing was opened. The motor number is 13464:

Propello Ray Motor 13464_1.jpg

Propello Ray Motor 13464_2.jpg

We noticed one of the armeters was a bit loose so we added tape to see if that would help. It did for the time being, but I plan on replacing since it is the original component (if we can find one).

If anyone you know is selling an extra motor, please do not hesitate to send them my way. Thank you!
 
  • Like
Reactions: southpaw

southpaw

Member
May 7, 2015
723
South-West
I could be wrong, but believe the motor was made by Rae. I think they are still in business but very doubtful anyone there would be of much help. A friend of mine contacted them with a similar issue, and it was pretty much a one way conversation.....
 
  • Like
Reactions: sting3037

Forum Statistics

Threads
54,108
Messages
450,320
Members
19,161
Latest member
ErikH

About Us

  • Since 1997, eLightbars has been the premier venue for all things emergency warning equipment. Discussions, classified listings, pictures, videos, chat, & more! Our staff members strive to keep the forums organized and clutter-free. All of our offerings are free-of-charge with all costs offset by banner advertising. Premium offerings are available to improve your experience.

User Menu

Secure Browsing & Transactions

eLightbars.org uses SSL to secure all traffic between our server and your browsing device. All browsing and transactions within are secured by an SSL Certificate with high-strength encryption.