2013 Ford PI Sedan-Update 7-10-12 HD Video

http://www.youtube.com/embed/qtItWFFEiQY&feature=plcp

Hi-Def video from the customer.


My low quality video
ai326.photobucket.com_albums_k436_mi2kga_2013_20Ford_20PI_20Sedan_e0ef286d.jpg

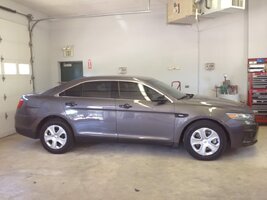
This is my first NGPI so I thought I would take some pics and point out some interesting things. I am working on better pics of some things and will have HD video up soon.

This is an unmarked vehicle that will be used for both investigations and patrol work.

Product list:
20% Window Tint
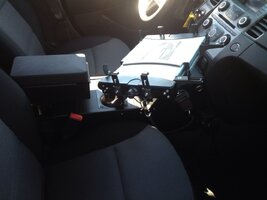
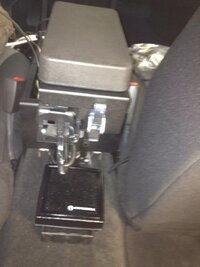
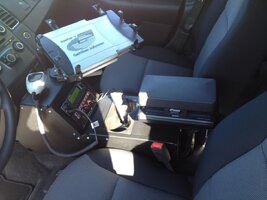
Gamber Johnson console (with computer mount and printer armrest)
Federal PA640
Motorola XTL5000 radio with low profile ant
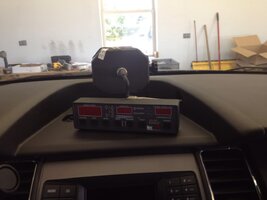
Golden Eagle Radar
Feniex Fairys (x8)
Feniex T4s (x4)
Feniex Python 800
Feniex Pegasus
Feniex Triton speaker

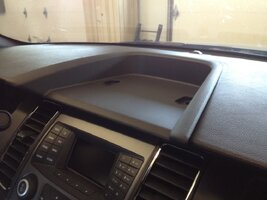
Console
ai326.photobucket.com_albums_k436_mi2kga_2013_20Ford_20PI_20Sedan_2835e252.jpg
ai326.photobucket.com_albums_k436_mi2kga_2013_20Ford_20PI_20Sedan_d7482cb7.jpg

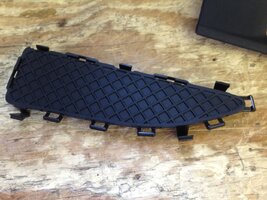
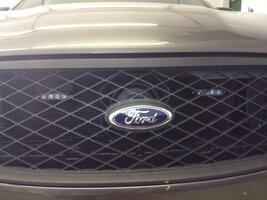
T4's and Triton in the grill. The entire front bumper cover is easy to remove. 10mm across the bottom, phillips screws, pop clips, and 10mm under hood, and pop clips in the wheel wells (one is hidden so watch for this)
ai326.photobucket.com_albums_k436_mi2kga_2013_20Ford_20PI_20Sedan_53eaf31d.jpg

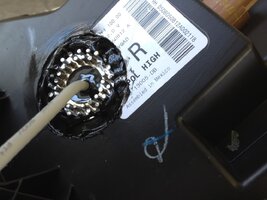
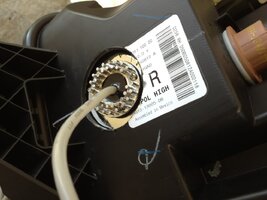
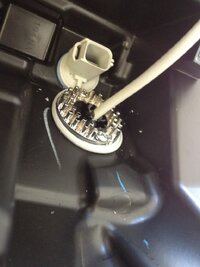
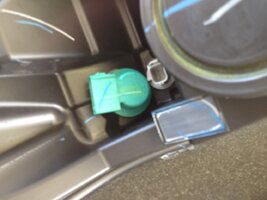
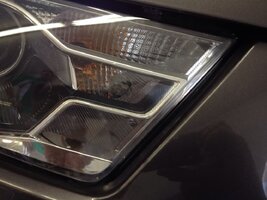
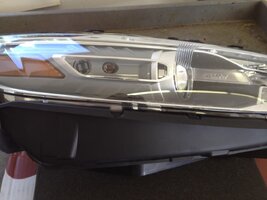
Fairys in the headlights. The headlight is easy to remote. I removed the preinstalled green plug for the factory hide aways and used the factory rubber seal. It worked out fine and they are very bright here.
ai326.photobucket.com_albums_k436_mi2kga_2013_20Ford_20PI_20Sedan_IMG_0972bmp_1.jpg
ai326.photobucket.com_albums_k436_mi2kga_2013_20Ford_20PI_20Sedan_IMG_0977.jpg
ai326.photobucket.com_albums_k436_mi2kga_2013_20Ford_20PI_20Sedan_IMG_0976.jpg
ai326.photobucket.com_albums_k436_mi2kga_2013_20Ford_20PI_20Sedan_IMG_0975.jpg
ai326.photobucket.com_albums_k436_mi2kga_2013_20Ford_20PI_20Sedan_IMG_0973.jpg
ai326.photobucket.com_albums_k436_mi2kga_2013_20Ford_20PI_20Sedan_5920805d.jpg
ai326.photobucket.com_albums_k436_mi2kga_2013_20Ford_20PI_20Sedan_2a30b900.jpg

Radar
ai326.photobucket.com_albums_k436_mi2kga_2013_20Ford_20PI_20Sedan_IMG_0944.jpg
ai326.photobucket.com_albums_k436_mi2kga_2013_20Ford_20PI_20Sedan_92cd2571.jpg
ai326.photobucket.com_albums_k436_mi2kga_2013_20Ford_20PI_20Sedan_IMG_0946.jpg
ai326.photobucket.com_albums_k436_mi2kga_2013_20Ford_20PI_20Sedan_IMG_0945.jpg

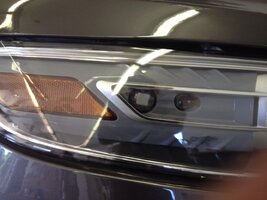
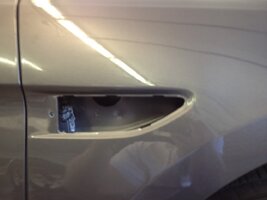
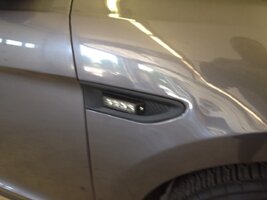
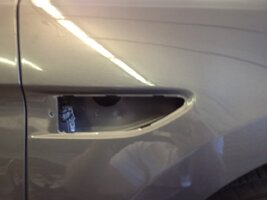
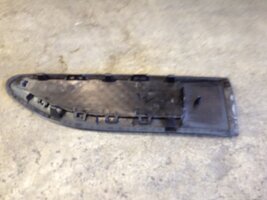
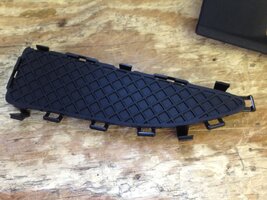
T4 Side markers. This is a very easy install. Get the wheel well cover off and reach up and pop them out, be gentle. It helps to replace the factory 3m tape.
ai326.photobucket.com_albums_k436_mi2kga_2013_20Ford_20PI_20Sedan_IMG_0941.jpg
ai326.photobucket.com_albums_k436_mi2kga_2013_20Ford_20PI_20Sedan_IMG_0939.jpg
ai326.photobucket.com_albums_k436_mi2kga_2013_20Ford_20PI_20Sedan_91a37cd4.jpg

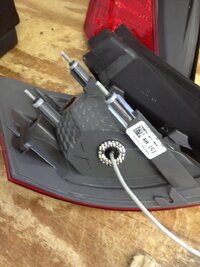
Rear tail lights and reverse lights: use caution with the big chrome piece, it seems cheep.
ai326.photobucket.com_albums_k436_mi2kga_2013_20Ford_20PI_20Sedan_IMG_0961.jpg

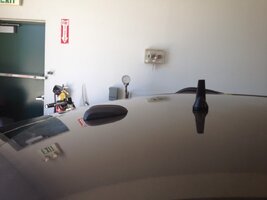
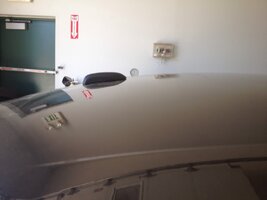
Antenna mount just ahead of fake factory antenna. I tried to replace it but the hole was a hair too big.
ai326.photobucket.com_albums_k436_mi2kga_2013_20Ford_20PI_20Sedan_afc916b5.jpg
ai326.photobucket.com_albums_k436_mi2kga_2013_20Ford_20PI_20Sedan_0014c794.jpg
ai326.photobucket.com_albums_k436_mi2kga_2013_20Ford_20PI_20Sedan_90acebf0.jpg

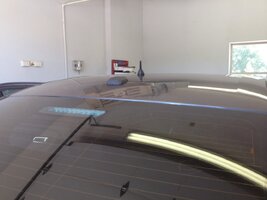
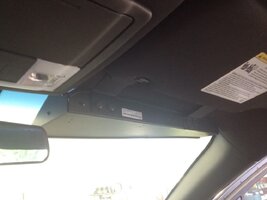
Split visor: I will get more pics but an easy install
ai326.photobucket.com_albums_k436_mi2kga_2013_20Ford_20PI_20Sedan_9c153710.jpg

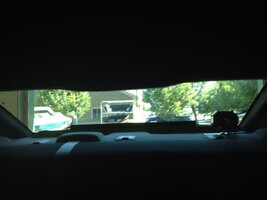
View from rear window
ai326.photobucket.com_albums_k436_mi2kga_2013_20Ford_20PI_20Sedan_0954bb9a.jpg

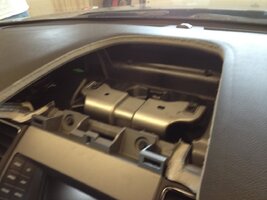
Console area
ai326.photobucket.com_albums_k436_mi2kga_2013_20Ford_20PI_20Sedan_IMG_0948.jpg

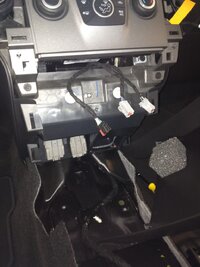
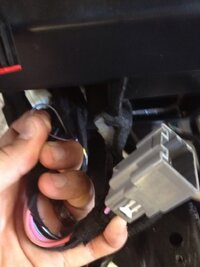
Horn ring loop: There is a horn loop taped to the 6 wire plug that has constant power and ground in it. It seems i missed this in the guide or it didnt appear in the copy i had. Its in there now for sure.
ai326.photobucket.com_albums_k436_mi2kga_2013_20Ford_20PI_20Sedan_22aab4fc.jpg

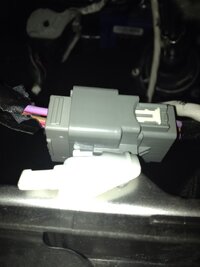
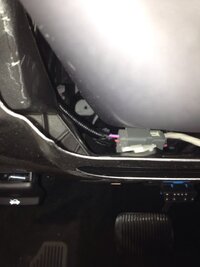
Now for something crappy. On the 6 wire plug for power and ground I had a good ground but no power. Low and behold this seems as if it was a friday car. Under the steering column attatched to the brace was a jumper that was unplugged. Plugged it in and all was good.
ai326.photobucket.com_albums_k436_mi2kga_2013_20Ford_20PI_20Sedan_00d48689.jpg
ai326.photobucket.com_albums_k436_mi2kga_2013_20Ford_20PI_20Sedan_1b9ddb75.jpg

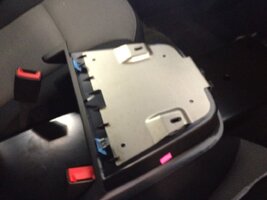
Printer stand and speaker
ai326.photobucket.com_albums_k436_mi2kga_2013_20Ford_20PI_20Sedan_05a02d23.jpg

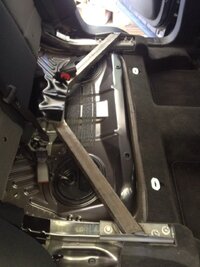
Cross braced back end. This is pretty amazing how beefy this was.
ai326.photobucket.com_albums_k436_mi2kga_2013_20Ford_20PI_20Sedan_2d74e9c9.jpg
 
Last edited by a moderator:

RL1

Member
May 20, 2010
1,650
Ga
I'm going to stalk this thread, BTW...


Feel free to posts pics of... well, anything from that car haha
 

Jordan_TCFD

Member
May 22, 2010
407
Chattanooga,TN, Bryant,
I want pictures of what the LED's look like from the outside when installed. Get videos of the lights on as well. I have 10 of these cars coming up that have the same package as that. What is your take on putting lights in the upper, unused, clear portion of the reverse lights?


Jordan,TCFD
 
I will be posting more pics tomorrow night. I was a little disappointed that there was no firewall pass through. I drilled a hole on the drivers side. I wish the wiring info on the upfitters guide was more thorough, its hard to follow the draft version I have.
 

TheGatekeeper

Member
Jun 19, 2010
1,734
France
Needless to say you have our undivided attention. ;)


Any chance to get a pic of the PI "as is" ?
 
5309 said:
interesting maybe give people a step by step :thumbsup:

Not a problem. I am taking lots of pics and I should have a nice update for you guys tonight. There have already been some interesting things on this car, like the main power to the console area not being hooked up. I plan on doing the pic update late tonight so stay tuned.
 

strobecrazy

Member
Apr 27, 2011
923
GA,ATL
kenton1979 said:
ai326.photobucket.com_albums_k436_mi2kga_2013_20Ford_20PI_20Sedan_IMG_0941.jpg
ai326.photobucket.com_albums_k436_mi2kga_2013_20Ford_20PI_20Sedan_IMG_0939.jpg


ai326.photobucket.com_albums_k436_mi2kga_2013_20Ford_20PI_20Sedan_IMG_0940_1.jpg


I surface mounted a T4 here because the customer liked that better but I think a fairy would have looked better. I will be messing with this more in the future, maybe some flush mount SOS ghosts. Anything cheaper than the whelen solution.

The new SOS Intersector SM would look good there.
 

Tylerb43

New Member
Jun 25, 2012
2
St. Louis, MO
kenton1979 said:
I will be posting more pics tomorrow night. I was a little disappointed that there was no firewall pass through. I drilled a hole on the drivers side. I wish the wiring info on the upfitters guide was more thorough, its hard to follow the draft version I have.

I'm not sure what date guide you have, but I just downloaded the latest and doesn't say draft on it anymore. Don't get excited though, it's still pretty crappy and incomplete information.


I'm struggling with a '13 PI Utility right now, can you please be more specific where you went through the firewall? I can't even figure out how to get a drill in there, very frustrated with Ford's effort on this vehicle as a whole.


Mine was apparently ordered with no options, and with no paperwork, I'm pretty lost.


I'm new to the forum, looking forward to finding some help, and trying to help others! :thumbsup:
 

Jordan_TCFD

Member
May 22, 2010
407
Chattanooga,TN, Bryant,
strobecrazy said:
The new SOS Intersector SM would look good there.


That's what I'm saying. I wished I had known the flush mounts were coming out and I would of told my one agency to order those instead of the under mirror ones. Easier to install and been a little better for intersection that much wore.


Jordan,TCFD
 
Tylerb43 said:
I'm struggling with a '13 PI Utility right now, can you please be more specific where you went through the firewall? I can't even figure out how to get a drill in there, very frustrated with Ford's effort on this vehicle as a whole.


I drilled to the left of the master cylinder. I have done two utility and one sedan and drilled both in the same area.
 

fleetcomm

Member
Sep 2, 2011
717
south of nowhere
Great work and keep the information coming!
 

Jluke

Member
Feb 27, 2012
64
Raleigh, NC USA
OK I am going to hijack this thread a bit to post some pics of the clear Vertex lights I mounted in the extra reverse light reflector that Jordan asked about.


IMAG0283.jpg


I will get some pics and video of my completed install soon. Great write up Kenton.

IMAG0284.jpg

IMAG0285.jpg

IMAG0286.jpg

IMAG0287.jpg

IMAG0288.jpg
 
Last edited by a moderator:
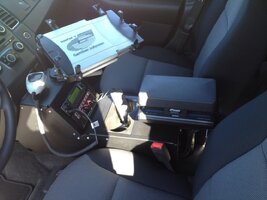
Hey thanks, this was exactly what I did with the exception that it was for blue hideaways. The pics are great because I didnt get good pics of this and I wasnt going to take the stuff apart again. I had to cut out the square just like that because if felt like the reflector would come loose if you cut any more. also if you cut any higher it would compromise the water barrier.


Thanks
 

Tylerb43

New Member
Jun 25, 2012
2
St. Louis, MO
kenton1979 said:
I drilled to the left of the master cylinder. I have done two utility and one sedan and drilled both in the same area.

Thanks for the reply, Kenton! I'm guessing you drilled from the engine bay side, so "left" is inboard of the master cylinder? Great thread by the way, did any of the PI's you've done have exterior light bars? The customer wants the cables ran down the a-pillar, so that's what I'm trying to push through the firewall. :duh: And I'm going to use the Feniex Triton as well, did you use it on the Utility with no fitment issues?


So are the 4 pin connectors stowed all over the car pretty much useless for upfitters unless a certain lighting or road-ready package was ordered?


Sorry for all the questions, thank you!! :hail:
 
Tylerb43 said:
Thanks for the reply, Kenton! I'm guessing you drilled from the engine bay side, so "left" is inboard of the master cylinder? Great thread by the way, did any of the PI's you've done have exterior light bars? The customer wants the cables ran down the a-pillar, so that's what I'm trying to push through the firewall. :duh: And I'm going to use the Feniex Triton as well, did you use it on the Utility with no fitment issues?

So are the 4 pin connectors stowed all over the car pretty much useless for upfitters unless a certain lighting or road-ready package was ordered?


Sorry for all the questions, thank you!! :hail:

No I came from the inside. Just slide the BCM out and there is a ton of room. The sedan jas a little nub I just used to ref the outside. It worked perfect and ended in just the right spot. It would be outboard from the master cylinder.


I have not done any on the new vehicle as of yet. I think they are all trying to take advantage of the fresh body style to be stealth, not to mention they are all admin type cars so they can test them out.


I dont see having any problems with the triton on that vehicle. You will probably have to make some brackets but otherwise its nice and small


I didnt use any of the connectors and to be honest I didnt even mess with them much. I am still learning the vehicles but I will be playing with that in the near future I hope.


I will have some quick vids up later along with more pics
 

Jordan_TCFD

Member
May 22, 2010
407
Chattanooga,TN, Bryant,
Thank you Jluke for posting those pictures. That was what I needed for my boss to say,"ok we can do that", even though I've been telling him I could use a Dremel and mount them there no problem.


For running lightbar cables I would suggest on the passenger side behind the glove box. If you look under the dash in the right corner you will see a hole in the black plastic with white plastic behind, this is drillable with a good 1 1/2 clearance on the outside.


Jordan,TCFD
 
Jordan said:
Thank you Jluke for posting those pictures. That was what I needed for my boss to say,"ok we can do that", even though I've been telling him I could use a Dremel and mount them there no problem.


For running lightbar cables I would suggest on the passenger side behind the glove box. If you look under the dash in the right corner you will see a hole in the black plastic with white plastic behind, this is drillable with a good 1 1/2 clearance on the outside.


Jordan,TCFD

The dremel with work just stay between the screws and make sure that you start on the bottom. The top is very tight to the inner reflector and you could get through both if you dont watch out. I assume your working with a cutting disk and not a drill bit cutter.


Good luck, they work great there. I guess thats the nice part about making the decisions at our shop. :D


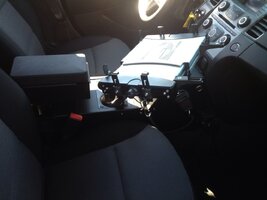
Here are a few pics of the inside now that its clean. If the iphone video will ever upload I will post it until the HD vid is done.


ai326.photobucket.com_albums_k436_mi2kga_2013_20Ford_20PI_20Sedan_2835e252.jpg


ai326.photobucket.com_albums_k436_mi2kga_2013_20Ford_20PI_20Sedan_d7482cb7.jpg
 
Last edited by a moderator:
mlwebb

New Member
Jun 27, 2012
1
Midwest
Finally received our first Sedan to build. Just a couple of quick questions for you that have built one already. Is the flashing park/turn/marker standard or an option in the sedan? Same with the wig-wag function? Also the four wires that are located near the passenger side headlight, missed what they are for in the upfitters guide, can anyone help me out? Just trying to get might feet under me on these since we have about ten more to go. Anything would be appreciated.
 
mlwebb said:
Finally received our first Sedan to build. Just a couple of quick questions for you that have built one already. Is the flashing park/turn/marker standard or an option in the sedan? Same with the wig-wag function? Also the four wires that are located near the passenger side headlight, missed what they are for in the upfitters guide, can anyone help me out? Just trying to get might feet under me on these since we have about ten more to go. Anything would be appreciated.

Its an option to have the light on the side of the headlight near the amber lense and the "wig wag" if you want to call it that. Its a costly one addition at that, I am thinking it was several hundred dollars.


I am pretty sure those wires do go under the center console but I have not played with them too much. They are in the manual on the diagrams but the upfitter guide leave much to be desired.


Good luck and we want to see some pics. Let me know what you find on those extra wires since I gave up quickly on them.
 

RL1

Member
May 20, 2010
1,650
Ga
Looks good, I love the printer/ arm rest. Does the visor light have a lot of dead time or does it just look that way from the video?
 

VolEms

Member
May 24, 2010
2,112
NY, USA
Love the install. Thanks for the detailed pics and vid. My only issue is the Fenix Haw. The Blue doesnt look crisp like a vertex and doesnt seem bright at all. Just my 2 cents. I think there is not much of a price diffence so why not go with the Vertex.
 
The visor light has no dwell time it's just the way the camera catches it. The laws do it too if you


Watch the close.


The fairys are exceptional and are very bright. I think it was just the video and the direct sunlight. I have installed many a vertex and they good but not superior in my opinion.


Hd day and night vids should help
 

Skip Goulet

Member
Feb 23, 2011
4,241
Midland, TX
Extremely nice! First non-Crown Vic. PI I've ever seen. I notice you're using Feniex lights on this unit. I notice they're showing up a lot on other installs. Is their quality that good?
 
New hi-def video supplied by end user. Its not too bad and it gives a better idea of how effective the lighting is. I know that people often say that direct sunlight shows it best but I feel the car appears much better in person that in my direct sunlight video (2nd video).


Thanks
 

Storm4200

Member
Nov 2, 2011
2,912
NJ
i think it looks GREAT and seems very effective. the rear patterns and light placements are perfect
 

nerdly_dood

Member
Jun 15, 2010
2,312
Georgia
TheGatekeeper said:
The next 2013 European Ford Mondeo... There is an air...
Also known as the Ford Fusion elsewhere in the world, if I'm not mistaken. :thumbsup:
 

Forum Statistics

Threads
54,111
Messages
450,326
Members
19,161
Latest member
ErikH

About Us

  • Since 1997, eLightbars has been the premier venue for all things emergency warning equipment. Discussions, classified listings, pictures, videos, chat, & more! Our staff members strive to keep the forums organized and clutter-free. All of our offerings are free-of-charge with all costs offset by banner advertising. Premium offerings are available to improve your experience.

User Menu

Secure Browsing & Transactions

eLightbars.org uses SSL to secure all traffic between our server and your browsing device. All browsing and transactions within are secured by an SSL Certificate with high-strength encryption.