Retired1
Member
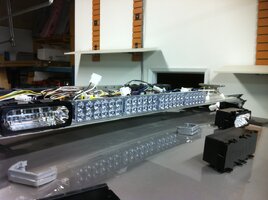
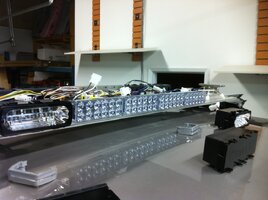
Recently, I purchased a quantity of Whelen SXTDLED kits to use in custom Liberty lightbar projects I am working on. The Whelen SXTDLED kit does not come with instructions. Here is how I installed them in a 48.5" Liberty SX:
1. Remove the end caps.
2. Remove all lenses.
3. Slide out and disconnect the corner LED modules.
4. Remove the top aluminum cover.
5. On the front side of the lightbar, disconnect the LEDs and slide out the 1st 3 modules and bucket retainers.
6. Disconnect the two halogen take downs (located in the center of this particular bar)
7. Slide out the two halogen take downs and retaining buckets.
8. Remove making tape from new SXTDLED module retining clip.
9. Slide in two SXTDLED modules.
10. Locate the center of the two SXTDLED modules in the center of the bar (22" exactly - from each end of the aluminum extrusion base) and remove the thin, static cling type, protective film from the front of the actual LED modules - it is easy to overlook this film.
11. Tighten set screw in retaining clip.
12. Connect SXTDLED modules to original halogen take down wire harness connectors.
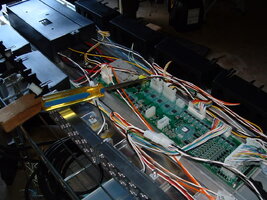
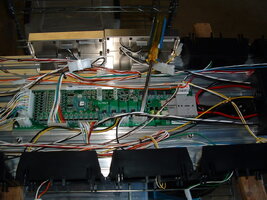
12a Alternate: Install new wire harness to the two SXTDLED modules and plug into the take down connector port on the I/O board. The correct connector port is located at the tip of the screwdiver in the photos below.
13. Slide the 3 LED modules and retaining buckets back into the bar and connect to wire harness.
14. Install top aluminum cover.
15. Connect the corner LED modules to the wire harness and slide into place.
16. Install all lenses.
17. Install end caps.
18. Test.
19. If test is okay, then install is done.
20. If test is not okay - seek help from someone other than me.
Note 1: I am now installing these in positions #2 and #5 (instead of positions #3 and #4). That puts both of them in between a colored LIN6
Note 2: If you want to keep your warning lights horizontal and adjust your SXTDLEDs downwards, a user supplied spacer can be fabricated and added to the rear of the SXTDLED mounting brackets. That will tilt the take down light downwards without affecting the warning lights.
It is very easy to do. You can use a piece of 1/16" or 1/8" x 3/8" aluminum bar stock cut to the width of the SXTDLED mounting bracket and super glue it to the bottom rear of the mount. Snug the attaching clamp to where the front edge is resting on the bar frame as normal and the bar stock is also resting on the frame. The take down light will be pointed downwards and your warning lights wil remain horizontal (even more so now - being able to be tweaked by your adjustable feet).
Another option is use 1/16" x 3/8 " aluminum bar stock and double side tape it to the bottom and that way, you can remove it easily and add more thickness, if desired.
*
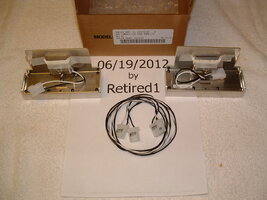
What is in the kit:
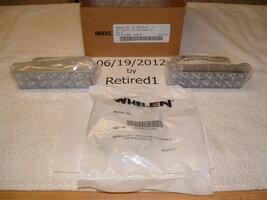
Unwrapped:
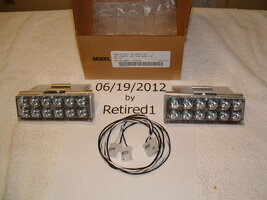
Rear view:
Screwdriver tip rests on take down port on I/O board:
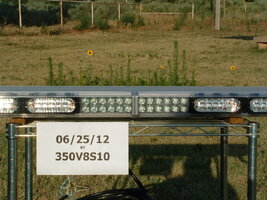
Installed in a Liberty (350V8S10 is my eBay ID):
Thank you for looking at my thread.
Terry
1. Remove the end caps.
2. Remove all lenses.
3. Slide out and disconnect the corner LED modules.
4. Remove the top aluminum cover.
5. On the front side of the lightbar, disconnect the LEDs and slide out the 1st 3 modules and bucket retainers.
6. Disconnect the two halogen take downs (located in the center of this particular bar)
7. Slide out the two halogen take downs and retaining buckets.
8. Remove making tape from new SXTDLED module retining clip.
9. Slide in two SXTDLED modules.
10. Locate the center of the two SXTDLED modules in the center of the bar (22" exactly - from each end of the aluminum extrusion base) and remove the thin, static cling type, protective film from the front of the actual LED modules - it is easy to overlook this film.
11. Tighten set screw in retaining clip.
12. Connect SXTDLED modules to original halogen take down wire harness connectors.
12a Alternate: Install new wire harness to the two SXTDLED modules and plug into the take down connector port on the I/O board. The correct connector port is located at the tip of the screwdiver in the photos below.
13. Slide the 3 LED modules and retaining buckets back into the bar and connect to wire harness.
14. Install top aluminum cover.
15. Connect the corner LED modules to the wire harness and slide into place.
16. Install all lenses.
17. Install end caps.
18. Test.
19. If test is okay, then install is done.
20. If test is not okay - seek help from someone other than me.
Note 1: I am now installing these in positions #2 and #5 (instead of positions #3 and #4). That puts both of them in between a colored LIN6
Note 2: If you want to keep your warning lights horizontal and adjust your SXTDLEDs downwards, a user supplied spacer can be fabricated and added to the rear of the SXTDLED mounting brackets. That will tilt the take down light downwards without affecting the warning lights.
It is very easy to do. You can use a piece of 1/16" or 1/8" x 3/8" aluminum bar stock cut to the width of the SXTDLED mounting bracket and super glue it to the bottom rear of the mount. Snug the attaching clamp to where the front edge is resting on the bar frame as normal and the bar stock is also resting on the frame. The take down light will be pointed downwards and your warning lights wil remain horizontal (even more so now - being able to be tweaked by your adjustable feet).
Another option is use 1/16" x 3/8 " aluminum bar stock and double side tape it to the bottom and that way, you can remove it easily and add more thickness, if desired.
*
What is in the kit:

Unwrapped:

Rear view:

Screwdriver tip rests on take down port on I/O board:


Installed in a Liberty (350V8S10 is my eBay ID):

Thank you for looking at my thread.
Terry
Last edited by a moderator:


