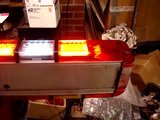
Give me a few minutes to try jerry rig this up and then I'll take a video and post it up. Would like to get some feedback on patterns and such.
You are using an out of date browser. It may not display this or other websites correctly.
You should upgrade or use an alternative browser.
You should upgrade or use an alternative browser.
Lets see pictures of custom lights/lightbars [CLOSED]
- Thread starter deputychief301
- Start date
- Status
- Not open for further replies.
Well as I suspected 5volts was not enough to power everything even to give a quick demo, but I took a video anyway and it is almost done encoding and then I'll upload it.
Unless you really really want to build your own light, it would be best to buy one from a reputable manufacturer.
paladin said:Looks good, do you have reflectors or diffusers?
What are you planning to mount them to?
I ordered 100 15 degree lens for Luxeon LEDs off ebay, and was planning on just using the plastic material used for florescent office lighting.
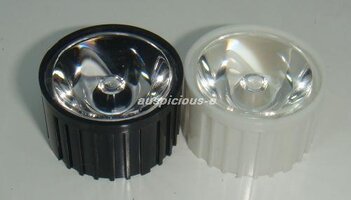
picture of the lenses.
And I am thinking about just mounting them into some aluminum U channel and fabricating a glare shield from maybe polycarbonate sheeting and cutting it to fit the windshield. For the rear bar and side I was going to mount it in aluminum U-channel and use suction cups to mount them. Since its not a permanent install I don't want to mess up my friends car too much.
For the front I might try to make some visor mount brackets because thats pretty easy to install and remove and then there is no chance of it falling. And I'll be powering it via 12v car adapter so I don't need to worry about running any hard wiring. Connections for the front bar are going to be two Cat5 cables (including ports so any cat5 cable will work) and then power, and then one more Cat5 run and power to the rear and an additional cat5 for the side markers (I may be able to run power through the cat5 but I need to double check that. The MOSFETs I am using to power the LEDs and the resistors put off some pretty decent heat, so I have to figure out a way to heat sink everything. May just use thermal adhesive to attach the proto board to the aluminum bracket.
nerdly_dood said:Unless you really really want to build your own light, it would be best to buy one from a reputable manufacturer.
I am building it for a class project. And I think I can make something on par (performance wise) as any reputable dealer, it just won't look quite as nice. And personally I think a lot of the manufactures have really poor interfaces / pattern selection. This I can change whenever I want.
Any body have thoughts on the patterns? I didn't want it to be to repetitive. It's kind of in demo mode so to speak right now. Its hard to see in the video but I have the while "take-downs" strobe with the rest of the modules because I didn't think it would throw enough light if I just had them steady burn. Thoughts on this? Strobing white vs. steady burn?
Last edited by a moderator:
sounds like you are just another whacker.........but thats my opinion !
take it how you want !!!
take it how you want !!!
Kemper said:I am building it for a class project. And I think I can make something on par (performance wise) as any reputable dealer, it just won't look quite as nice. And personally I think a lot of the manufactures have really poor interfaces / pattern selection. This I can change when ever I want.
In that case good luck. :thumbsup:
911 said:sounds like you are just another whacker.........but thats my opinion !
take it how you want !!!
I don't follow, you'll have to help me out with the inside jokes.
Kemper said:I don't follow, you'll have to help me out with the inside jokes.
I thought you said you'd been lurking around here for awhile...you should have seen that term by now.
But, with regard to the bar, It looks like a decent effort, considering that I have absolutely zero patience for laying all that stuff out and programming it. And that's why the lighting manufacturers get my money.
AZEMT said:I thought you said you'd been lurking around here for awhile...you should have seen that term by now.Anyway, a whacker is someone who outfits their vehicle with lights, sirens, radios, etc. and other public-safety type equipment when they have no reason to do so. Or, more commonly, they have a very tenuous reason to justify it, like, say, a class project
. "Over-dimensional load management" or funeral escorting are also popular.
But, with regard to the bar, It looks like a decent effort, considering that I have absolutely zero patience for laying all that stuff out and programming it. And that's why the lighting manufacturers get my money.
I'd seen the term before but I didn't know the whole story.
Clearly, my sense of humor hasn't been fully conveyed. :weird:
Last edited by a moderator:
Kemper said:I'd seen the term before but I didn't know the whole story. And yea I get why people may think that and I am sure I'll have a little fun if I end up DD for my drunk buddies after they get installed. But it's mostly because I thought it would be a challenge to build one and power it properly. When it's all said and done I'll probably end up selling it to re-coup the project cost and to avoid any temptations. I do miss the days when I could hit the lights and make a quick u-turn though.

View attachment 7717
wow.
Kemper said:I'd seen the term before but I didn't know the whole story. And yea I get why people may think that and I am sure I'll have a little fun if I end up DD for my drunk buddies after they get installed. But it's mostly because I thought it would be a challenge to build one and power it properly. When it's all said and done I'll probably end up selling it to re-coup the project cost and to avoid any temptations. I do miss the days when I could hit the lights and make a quick u-turn though.
Just stop the project or do not put it in your vehicle if you are going to feel "tempted." How pathetic. It's hard for young guys such as myself to be seen as responsible with lights in their cars when there are people like you out there talking about putting emergency lights on to do a simple U-turn
tom said:Just stop the project or do not put it in your vehicle if you are going to feel "tempted." How pathetic. It's hard for young guys such as myself to be seen as responsible with lights in their cars when there are people like you out there talking about putting emergency lights on to do a simple U-turn
Amen to that! :thumbsup:
Okay, It seems there has been some mis communication / mis understanding here. The part about being tempted was sarcasm, the second part regarding activating emergency lighting to turn around was me reminiscing when I was an explorer and one of the few times we were authorized to use the equipment on our department vehicle it was to turn around and block traffic.
I may be young, but I am not stupid. This project is going to be temporarily installed in a friends vehicle to shoot my thesis film, then removed and retired to be used as a party lighting.
Now, if you've all had your fun belittling me I'd like to update this thread with the progress I've made this week.
Is that alright with everyone? Or would you like my driver's license number in order to send me a ticket in the mail?
Kemper said:I am building it for a class project. And I think I can make something on par (performance wise) as any reputable dealer, it just won't look quite as nice. And personally I think a lot of the manufactures have really poor interfaces / pattern selection. This I can change when ever I want.
Any body have thoughts on the patterns? I didn't want it to be to repetitive. It's kind of in demo mode so to speak right now. Its hard to see in the video but I have the while "take-downs" strobe with the rest of the modules because I didn't think it would throw enough light if I just had them steady burn. Thoughts on this? Strobing white vs. steady burn?
Being that your a college student and this is all for a coarse project, I feel it my duty to inform you that it's "whenever", not "when ever".
WS224 said:Being that your a college student and this is all for a coarse project, I feel [that] it [is] my duty to inform you that it's "whenever", not "when ever".
Being that you're giving people grammar lessons, let me put a few in bold.
nerdly_dood said:Being that you're giving people grammar lessons, let me put a few in bold.
Beat me to it!
Made some great progress on my project this week. I received all the parts I had ordered and was finally able to do a full setup (with all front modules) test at full operating power and I am very happy with the results. I'll try to take some video of it in the daylight tomorrow. I may try to test it next to the department of public safety's LED Bars to give something to compare it to.
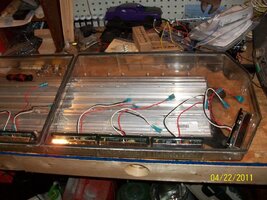
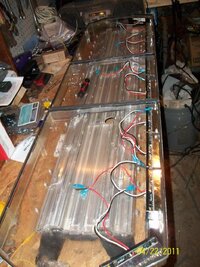
Anyway. On to some pictures. Please excuse the roughness, was just trying to lay everything out to see how it looked before I start soldering the boards and mounting the LED's


Anyway. On to some pictures. Please excuse the roughness, was just trying to lay everything out to see how it looked before I start soldering the boards and mounting the LED's


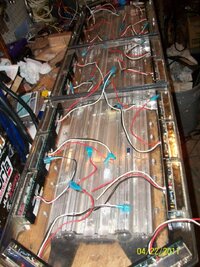
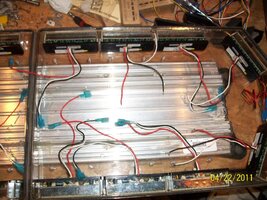
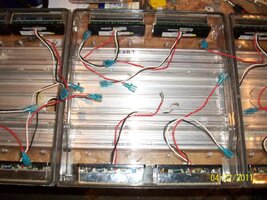
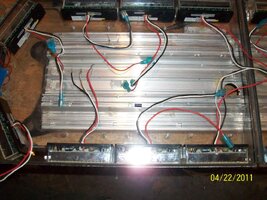
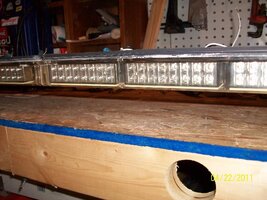
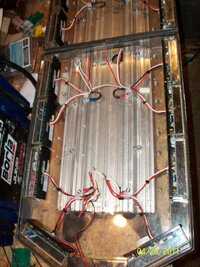
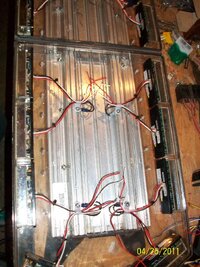
I have aleady spent more on this project led lightbar than if I were to have just bought a nice used bar, but here is what I have started.
Parts used: 47'' code 3 excalibur lower trays, 2100 tops
Still need upper domes and a led flasher, MR11 alleys & MR11 take downs
20) Code 3 amber ledx modules, 16 leds per module=320 for the full bar
--------------------------------------------------------------------------------------------------------------------------------------------
--------------------------------------------------------------------------------------------------------------------------------------------
--------------------------------------------------------------------------------------------------------------------------------------------
--------------------------------------------------------------------------------------------------------------------------------------------
--------------------------------------------------------------------------------------------------------------------------------------------
--------------------------------------------------------------------------------------------------------------------------------------------
--------------------------------------------------------------------------------------------------------------------------------------------
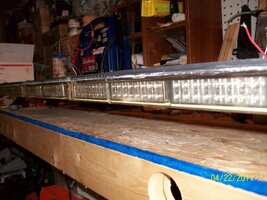
Phase 2, wires are straped, zip tied and grounded, just waiting on my led flasher to finish up the wiring
--------------------------------------------------------------------------------------------------------------------------------------------
--------------------------------------------------------------------------------------------------------------------------------------------
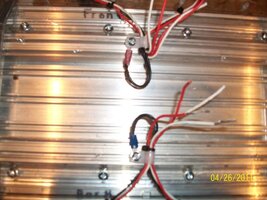
--------------------------------------------------------------------------------------------------------------------------------------------
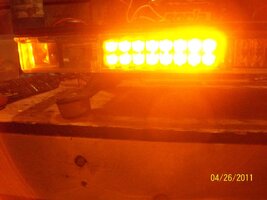
--------------------------------------------------------------------------------------------------------------------------------------------
I just wired up 2 of the heads to see how it's gonna look
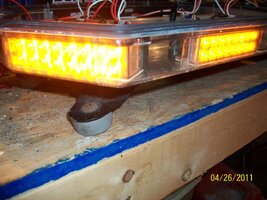
--------------------------------------------------------------------------------------------------------------------------------------------
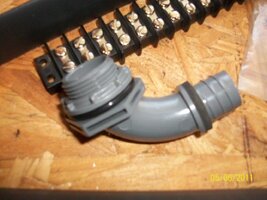
--------------------------------------------------------------------------------------------------------------------------------------------
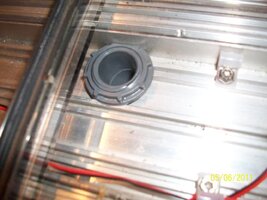
--------------------------------------------------------------------------------------------------------------------------------------------
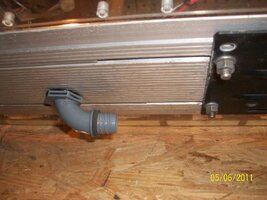
--------------------------------------------------------------------------------------------------------------------------------------------
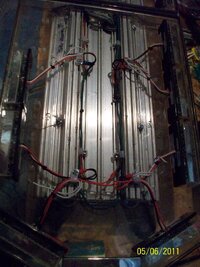
--------------------------------------------------------------------------------------------------------------------------------------------
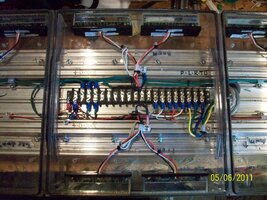
--------------------------------------------------------------------------------------------------------------------------------------------
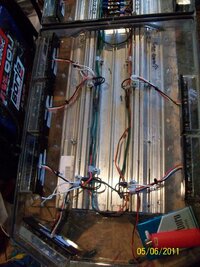
--------------------------------------------------------------------------------------------------------------------------------------------
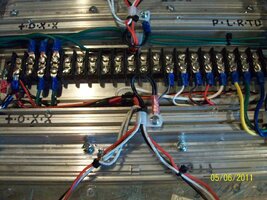
Parts used: 47'' code 3 excalibur lower trays, 2100 tops
Still need upper domes and a led flasher, MR11 alleys & MR11 take downs
20) Code 3 amber ledx modules, 16 leds per module=320 for the full bar

--------------------------------------------------------------------------------------------------------------------------------------------

--------------------------------------------------------------------------------------------------------------------------------------------

--------------------------------------------------------------------------------------------------------------------------------------------

--------------------------------------------------------------------------------------------------------------------------------------------

--------------------------------------------------------------------------------------------------------------------------------------------

--------------------------------------------------------------------------------------------------------------------------------------------

--------------------------------------------------------------------------------------------------------------------------------------------

Phase 2, wires are straped, zip tied and grounded, just waiting on my led flasher to finish up the wiring

--------------------------------------------------------------------------------------------------------------------------------------------

--------------------------------------------------------------------------------------------------------------------------------------------

--------------------------------------------------------------------------------------------------------------------------------------------

--------------------------------------------------------------------------------------------------------------------------------------------
I just wired up 2 of the heads to see how it's gonna look

--------------------------------------------------------------------------------------------------------------------------------------------

--------------------------------------------------------------------------------------------------------------------------------------------

--------------------------------------------------------------------------------------------------------------------------------------------

--------------------------------------------------------------------------------------------------------------------------------------------

--------------------------------------------------------------------------------------------------------------------------------------------

--------------------------------------------------------------------------------------------------------------------------------------------

--------------------------------------------------------------------------------------------------------------------------------------------

Last edited by a moderator:
Aw man, you had 47' (foot) in your title and then when I clicked on it, it turned out to be a 47" (inch) bar. I feel like I just got taken by a bait and switch tactic. :-( lol
Those are all way more legit than my project. The reason I am making a visor mount is because I didn't want to have to deal with weather-proofing everything, and I'm only going to have it installed for a short time.
Little bit of an update. I got the "power supplies" essentially for the LEDs soldered on two my two proto boards, while testing them I managed to toast a few pairs of LEDs so I decided to take a break. Might try to take some pictures later tonight, because thats what people seem to enjoy most. The next step is to get some project boxes and mount them to the U-channel and then mount and wire the LED modules. I still need to get a project box for my micro-controller and switches.
Turns out a friend of my has a light permit so after I shoot my video I might change the red side to blue she's an EMT and I think a VFF (can't quite remember I was pretty intoxicated when this came up)
Since this may turn back into a full blown set up does anyone have some suggestions for how much rear and intersection warning is appropriate?
Lots of views but fairly limited feedback. I'm surprised I didn't get more nibbles. Even it was to call me a whacker.
Kemper said:Updated video!
it looks awesome. im starting to play with the arduino boards and am probably going to try and make a flasher for my lights. If you dont mind me asking how much $ have you put into the lightbar?
[EBAY][/EBAY]
I have been kind of avoiding doing that just because it was a lot more than I intended to spend. I'm going to say maybe $200-$300 total. That includes the arduino (~$35), lenses for the LEDs ($40), LEDs (~$80), MISC electronics and switches ($40) and materials ($40). I am pressed for time due to other homework and had to improvise considering I'm building this in a dorm room. To do a full setup. You really need more control inputs than what I have on my board (12) (check out the arduino mega, it has a lot more inputs to work with.) Feel free to get in touch with me if you need any more info (like part numbers, where I bought stuff, how I hooked everything up, tips, pictures, pattern programming code etc) :thumbsup:
I got a lot of help from some of my electrical engineering and computer science friends too. (Always helps =P)
ac316scu said:it looks awesome. im starting to play with the arduino boards and am probably going to try and make a flasher for my lights. If you dont mind me asking how much $ have you put into the lightbar?
I have been kind of avoiding doing that just because it was a lot more than I intended to spend. I'm going to say maybe $200-$300 total. That includes the arduino (~$35), lenses for the LEDs ($40), LEDs (~$80), MISC electronics and switches ($40) and materials ($40). I am pressed for time due to other homework and had to improvise considering I'm building this in a dorm room. To do a full setup. You really need more control inputs than what I have on my board (12) (check out the arduino mega, it has a lot more inputs to work with.) Feel free to get in touch with me if you need any more info (like part numbers, where I bought stuff, how I hooked everything up, tips, pictures, pattern programming code etc) :thumbsup:
I got a lot of help from some of my electrical engineering and computer science friends too. (Always helps =P)
I'll also add that because I am on such a tight budget (no credit card =/ ) I wasn't able to make it as nice as I would habe liked. I wanted to fully enclose the power supplies in project boxes, and get some RJ 45 ports so I could just use any ethernet cable to hook everything up together. I also wasn't able to get and nice terminals to wire everything nicely. Right now its kind of just zip tied, gaff taped or glued in place. I did tidy it up a lot more last night and I'm just going to leave it as is because its not a permanent install. I should be installing it in my friends vehicle sometime tomorrow so ill try to take some more pictures then.
Kemper said:[EBAY][/EBAY]
I have been kind of avoiding doing that just because it was a lot more than I intended to spend. I'm going to say maybe $200-$300 total. That includes the arduino (~$35), lenses for the LEDs ($40), LEDs (~$80), MISC electronics and switches ($40) and materials ($40). I am pressed for time due to other homework and had to improvise considering I'm building this in a dorm room. To do a full setup. You really need more control inputs than what I have on my board (12) (check out the arduino mega, it has a lot more inputs to work with.) Feel free to get in touch with me if you need any more info (like part numbers, where I bought stuff, how I hooked everything up, tips, pictures, pattern programming code etc) :thumbsup:
I got a lot of help from some of my electrical engineering and computer science friends too. (Always helps =P)
pm sent
Kemper said:Updated video!
Lookin good! that thing is wicked bright...I can't wait to see the finihed product:thumbsup:
Kemper said:[EBAY][/EBAY]
I have been kind of avoiding doing that just because it was a lot more than I intended to spend. I'm going to say maybe $200-$300 total. That includes the arduino (~$35), lenses for the LEDs ($40), LEDs (~$80), MISC electronics and switches ($40) and materials ($40). I am pressed for time due to other homework and had to improvise considering I'm building this in a dorm room. To do a full setup. You really need more control inputs than what I have on my board (12) (check out the arduino mega, it has a lot more inputs to work with.) Feel free to get in touch with me if you need any more info (like part numbers, where I bought stuff, how I hooked everything up, tips, pictures, pattern programming code etc) :thumbsup:
I got a lot of help from some of my electrical engineering and computer science friends too. (Always helps =P)
What parts do you use for
- LED power-supply (for limited current)
- LED switching (MOSFETs? Which?)
kitesurfer1404 said:What parts do you use for
- LED power-supply (for limited current)
- LED switching (MOSFETs? Which?)
MOSFETs IPP110N06LG
Infineon MOSFET Power
N-CH 60V 78A
Link: IPP110N06L G Infineon Technologies MOSFET Power
Resistors
MO2CT631R120J
KOA Speer Metal Oxide Resistors
2W 12 5%
Link:MO2CT631R120J KOA Speer Metal Oxide Resistors
You need 1 MOSFET and 1 resistor for every pair of LEDs (For me I have 40 LEDs) so I used 20 MOSFETs and 20 Resistors. I also used one 100 ohm resistor as a drain for every two pairs (I had 4 LEDs for each module so two pairs = 1 module)
Will try to take some pictures of my circuit boards that I soldered together and put together a wiring diagram.
:thumbsup:
Sorry for the delay.
Got kinda busy making sure I graduated and all.
Finally got moved back home and decided to see if my project survived being shipped across the country by test fitting it in my moms mini-van. I know it's at night so you can't really judge how bright it is (trust me I am curious too) I may put the light bar back in tomorrow and try to shoot a video during daylight hours.
And I made sure to include my license plate in case any LEO's would like to verify that this is no longer in the vehicle. :thumbsup:
Got kinda busy making sure I graduated and all.
Finally got moved back home and decided to see if my project survived being shipped across the country by test fitting it in my moms mini-van. I know it's at night so you can't really judge how bright it is (trust me I am curious too) I may put the light bar back in tomorrow and try to shoot a video during daylight hours.
And I made sure to include my license plate in case any LEO's would like to verify that this is no longer in the vehicle.
Kemper said:Sorry for the delay.
Got kinda busy making sure I graduated and all.
Finally got moved back home and decided to see if my project survived being shipped across the country by test fitting it in my moms mini-van. I know it's at night so you can't really judge how bright it is (trust me I am curious too) I may put the light bar back in tomorrow and try to shoot a video during daylight hours.
And I made sure to include my license plate in case any LEO's would like to verify that this is no longer in the vehicle.:thumbsup:
I have to say that I am very impressed! For a college project, I hope you get a good grade on it, you really have spent some time and effort on it!
- Status
- Not open for further replies.


