Skulldigger
Member
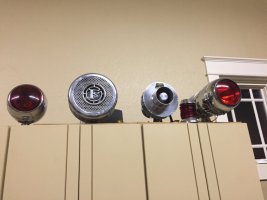
Several asked about how I was wiring my new display up. So I took pictures today while I was working on it. I may do a video evenually, but I think the photos will show it pretty well.
I am using standard 14-2 Copper wire that you would wire your house with. It is rated at 600 volts. I only use the white and black wires.

I have 1-1/2" aluminum flat bar covering the wooden shelf fronts. I did this with the intent of using it to mount the toggle switches too, plus it just looks really nice on the shelf fronts. I drill a 1/2" hole into the flat bar where I want to mount my toggle switch. I first put two pieces of tape on the shelf so that the bit will not slip and the whole will be more round.
.JPG")
.JPG")
I purchased toggle switches off of Ebay for less than $1 a piece. They have an LED in the tip of the switch that lights when on. Not necessary but it was harder to find them without the LED. Keep in mind though if you do have an LED you have to run an extra ground wire for the switch.

The switches take the slow boat from China, by the way, so order them a month in advance of doing the work.
Here is a basic diagram I did to show the wiring connections. The red wire in the diagram is actually the white wire. You can purchase 14-2 wire with red black if you choose.

The first light I connect is on the end run. So I merely strip back the sheathing a few inches and cut the insulation back about 3/8" on the ends of the two wires. I just snip the copper wire off so it's not in my way.
.JPG")
Then cut some wire for the toggle switch. I am reusing wire I had for the previous display which is red and black.
.JPG")
The switches are labeled. Left is positive in, middle is power to the light and right is negative. The middle wire has to be long enough to reach the wire coming from the light. The other two only have to reach the middle of the shelf where the main wire is passing.
.JPG")
This shows the toggle switch wired at the end of the run.
.JPG")
Toggle switch installed in the whole we drilled..JPG")
The wires from the light drops down behind the shelf and connects to the switch.
.jpg")
The wires are secured and tucked for neatness.
.JPG")
Testing the connection.
.JPG")
Then I move down to where the next switch is going and cut the wire 4" longer than needed. That accounts for the bends you need to connect wires together and stripping.
.JPG")
.JPG")
Wire the switch up just as before.
.JPG")
Tuck the wires and move on down the line. I place a switch about every 9-1/2" along the shelf, that seems to work fine for small or big lights.
.JPG")
The wires when tucked neatly do not show without stooping and looking under the shelf. My tallest shelf is 5' so only kids will notice the wiring. If your shelf is taller you could cut some 1/8 plywood and use stud spacers to make a bottom with a space for the wiring.
.JPG")
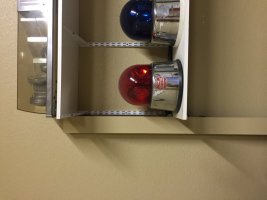
The middle of my second shelf is where I have my various throw lights with lighter plugs. I tied a double power unit to the front of the shelf to use for them. I may add another two port one later.
.JPG")
.JPG")
I am using standard 14-2 Copper wire that you would wire your house with. It is rated at 600 volts. I only use the white and black wires.
I have 1-1/2" aluminum flat bar covering the wooden shelf fronts. I did this with the intent of using it to mount the toggle switches too, plus it just looks really nice on the shelf fronts. I drill a 1/2" hole into the flat bar where I want to mount my toggle switch. I first put two pieces of tape on the shelf so that the bit will not slip and the whole will be more round.
I purchased toggle switches off of Ebay for less than $1 a piece. They have an LED in the tip of the switch that lights when on. Not necessary but it was harder to find them without the LED. Keep in mind though if you do have an LED you have to run an extra ground wire for the switch.
The switches take the slow boat from China, by the way, so order them a month in advance of doing the work.
Here is a basic diagram I did to show the wiring connections. The red wire in the diagram is actually the white wire. You can purchase 14-2 wire with red black if you choose.
The first light I connect is on the end run. So I merely strip back the sheathing a few inches and cut the insulation back about 3/8" on the ends of the two wires. I just snip the copper wire off so it's not in my way.
Then cut some wire for the toggle switch. I am reusing wire I had for the previous display which is red and black.
The switches are labeled. Left is positive in, middle is power to the light and right is negative. The middle wire has to be long enough to reach the wire coming from the light. The other two only have to reach the middle of the shelf where the main wire is passing.
This shows the toggle switch wired at the end of the run.
Toggle switch installed in the whole we drilled.
The wires from the light drops down behind the shelf and connects to the switch.
The wires are secured and tucked for neatness.
Testing the connection.
Then I move down to where the next switch is going and cut the wire 4" longer than needed. That accounts for the bends you need to connect wires together and stripping.
Wire the switch up just as before.
Tuck the wires and move on down the line. I place a switch about every 9-1/2" along the shelf, that seems to work fine for small or big lights.
The wires when tucked neatly do not show without stooping and looking under the shelf. My tallest shelf is 5' so only kids will notice the wiring. If your shelf is taller you could cut some 1/8 plywood and use stud spacers to make a bottom with a space for the wiring.
The middle of my second shelf is where I have my various throw lights with lighter plugs. I tied a double power unit to the front of the shelf to use for them. I may add another two port one later.

.JPG")
.JPG")


.JPG")
.JPG")